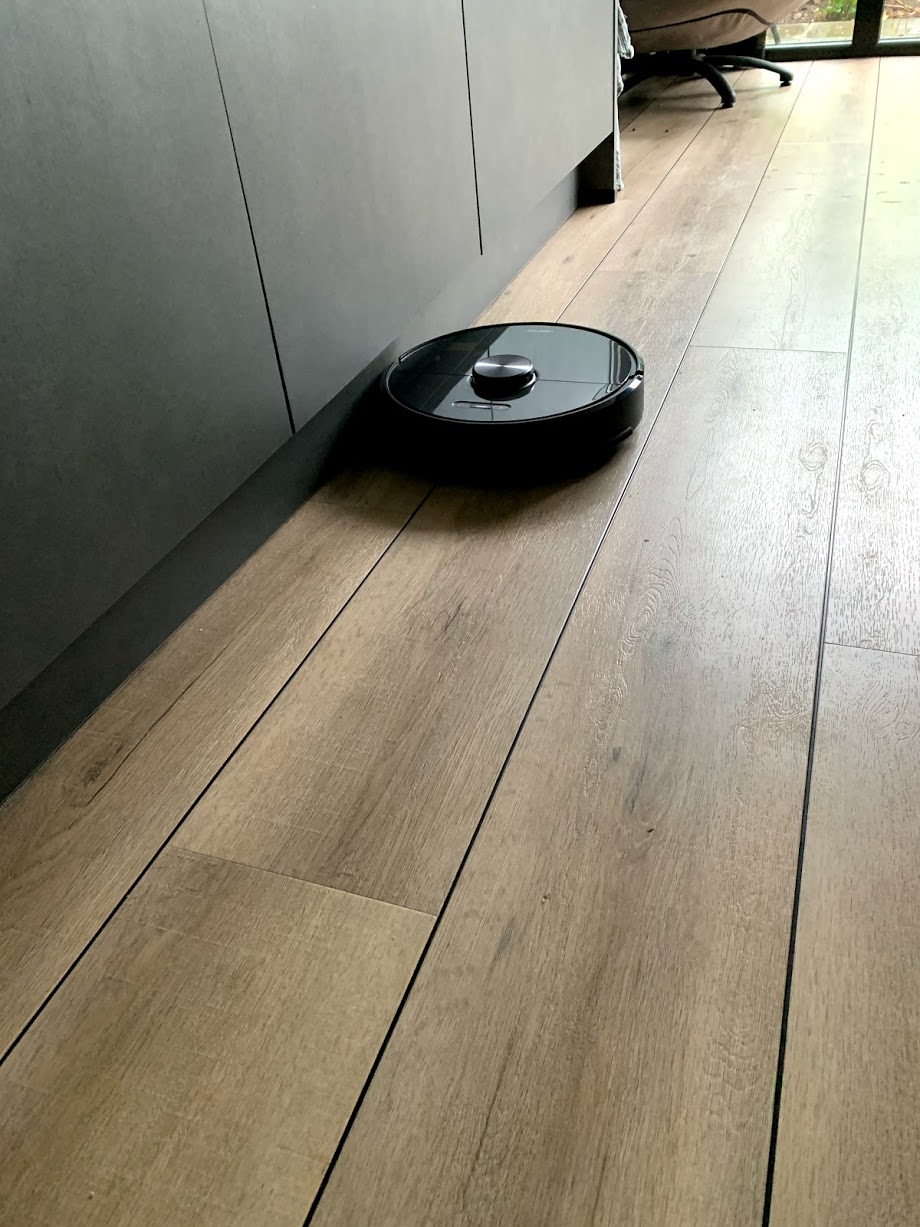
Having your Robot Vacuum (Robi) controlled by free@home is such a relief! Activating scene "Leaving Home" --> Robi start! Perfect!
Requirement for this how-to
- Your free@home system is linked to Openhab 3.0
- System Access Point 2.0
- WelcomeIP Panel (not a necessity)
- Local API is activated in the free@home next App
Part 1: Creating virtual devices (schaltactor) in free@home
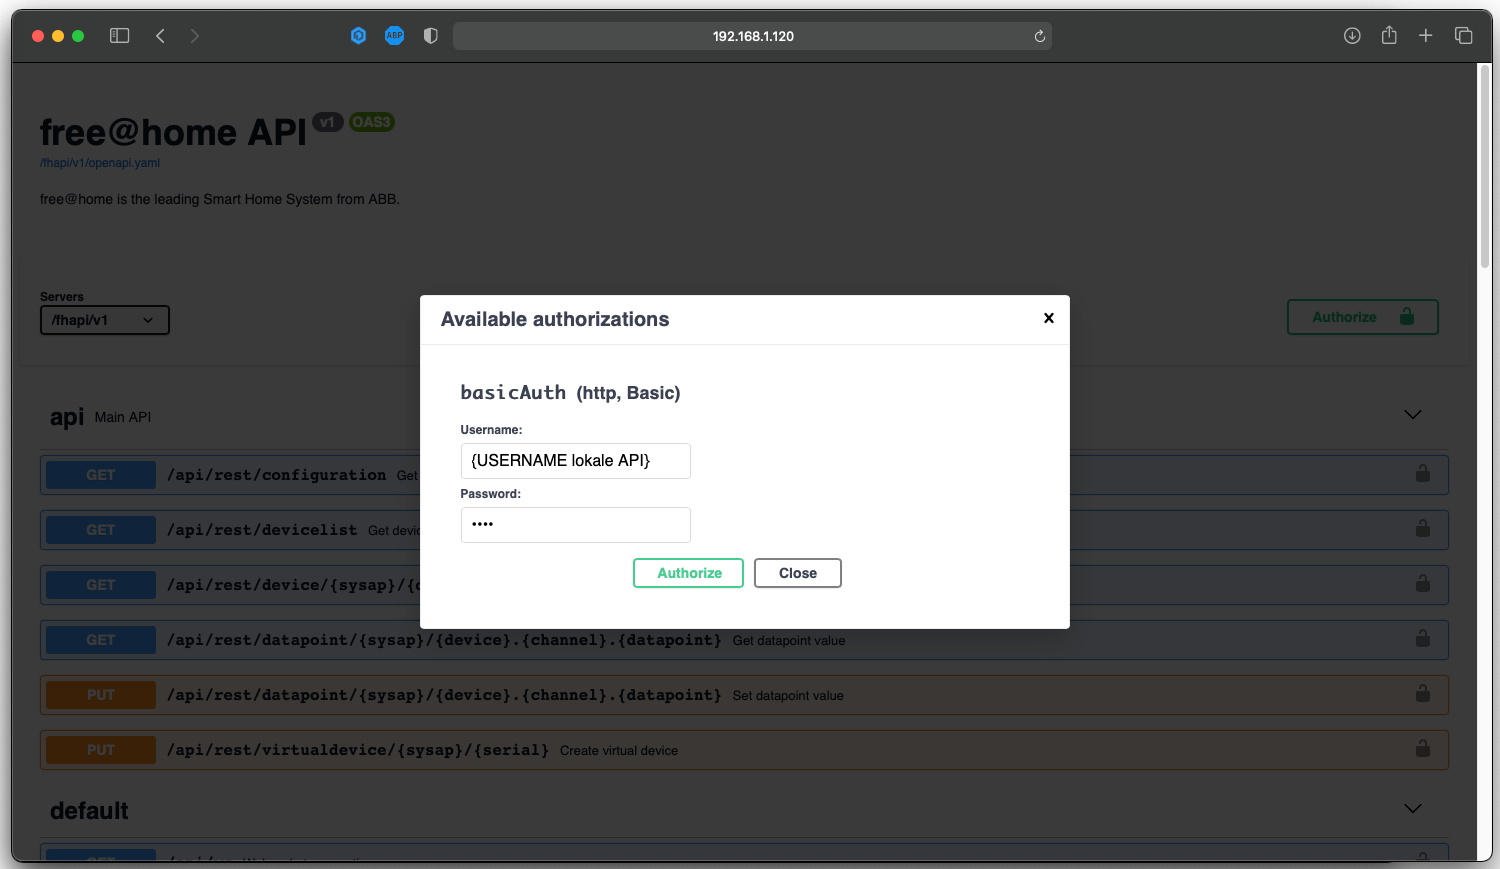
- Go to <IP of your System Access Point> / swagger in your browser
- Click on Authorize and enter the access data that you can see in the free @ home next app under "Settings -> Local API". Confirm with "Login" and close the popup.
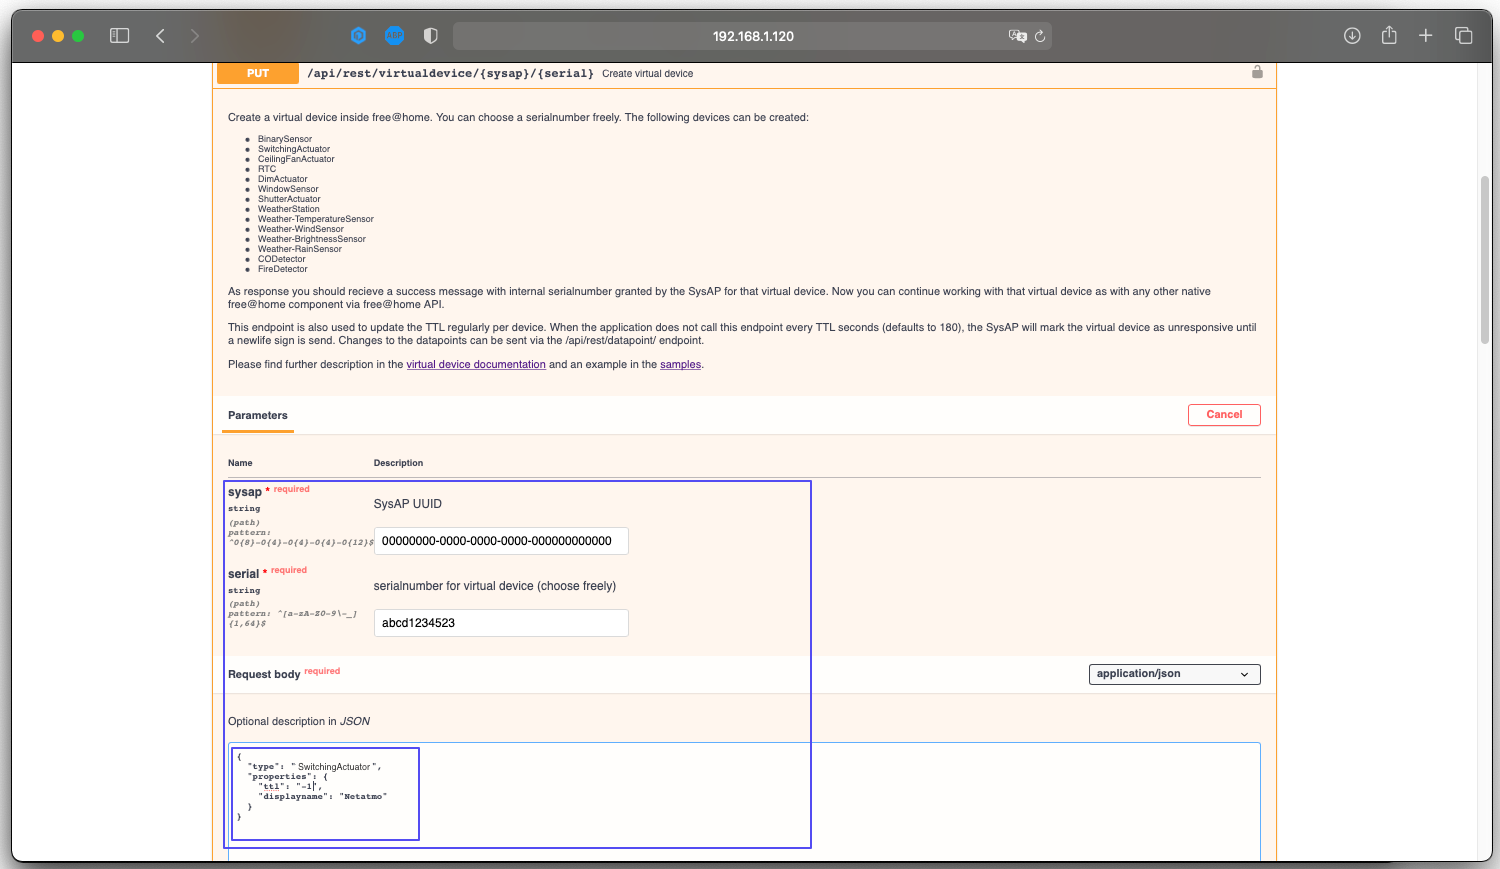
- Click on the button "Create virtual device", press try out and fill in the mask according to the picture
{ "type": "SwitchingActuator", "properties": { "ttl": "-1", "displayname": "Virtual switch" } }
- A virtual button should now appear in free @ home, which you can place in the building plan as usual.
- You can create further virutal buttons as in point 3, only that you change the serial number as you like, eg increment one.
- Change the name of this button to “Start or Pauze or Return to dock”
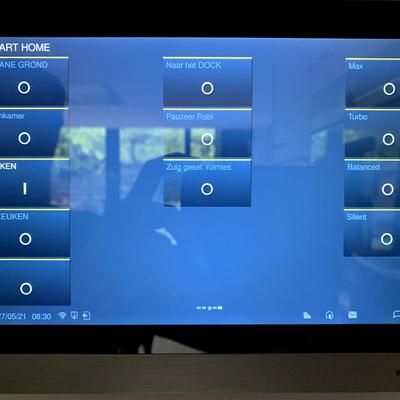
Do this again for the other 2 buttons (Pauze or Return to Dock). If you wish to also create the fan level buttons, repeat the creation of the virtual devices as many times as required. Perhaps you have to create an additional floor or room in your home to place these buttons?
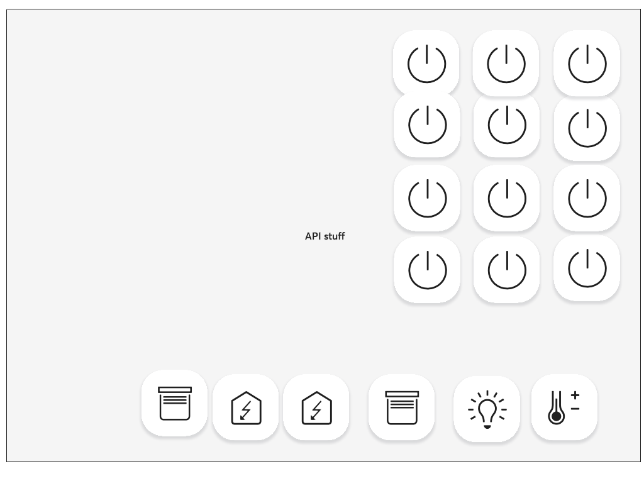
Go to configuration page of the WelcomeIP panel and place all the created buttons in a smart order. Have a look at the first photo!
For now you are done on the free@home side.
If you wish to use the free@home time menu to activate the Robot Vacuum, this can be done as a normal lamp or other functions. Also the button “Start” can be connected to a scene for example “Leaving the house”. Whenever this scene is activated the vacuum will start its cleaning session
To be done on Openhab 3.0
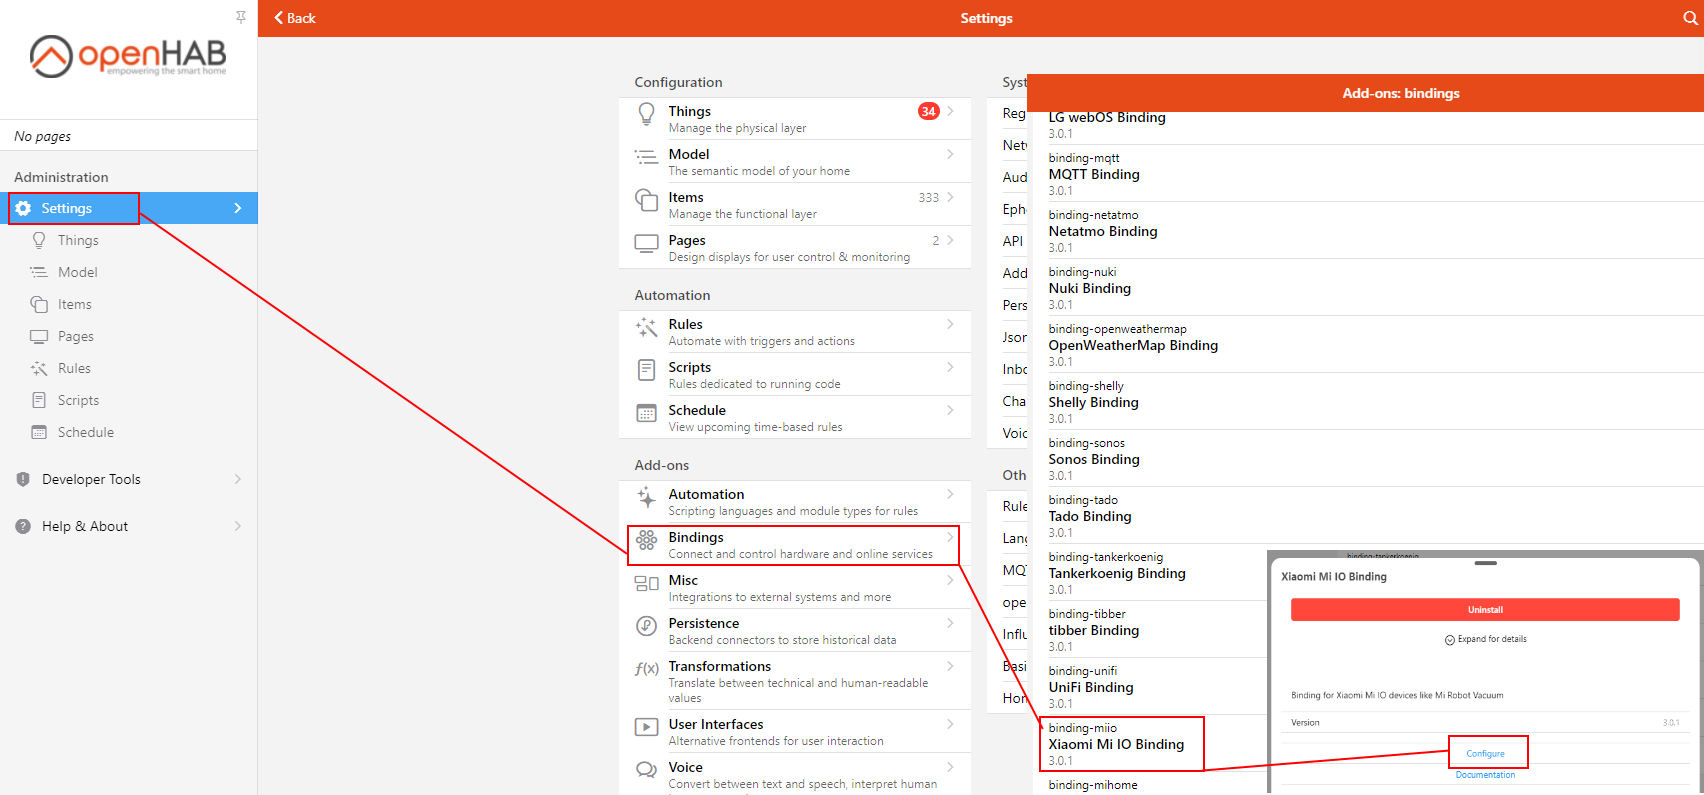
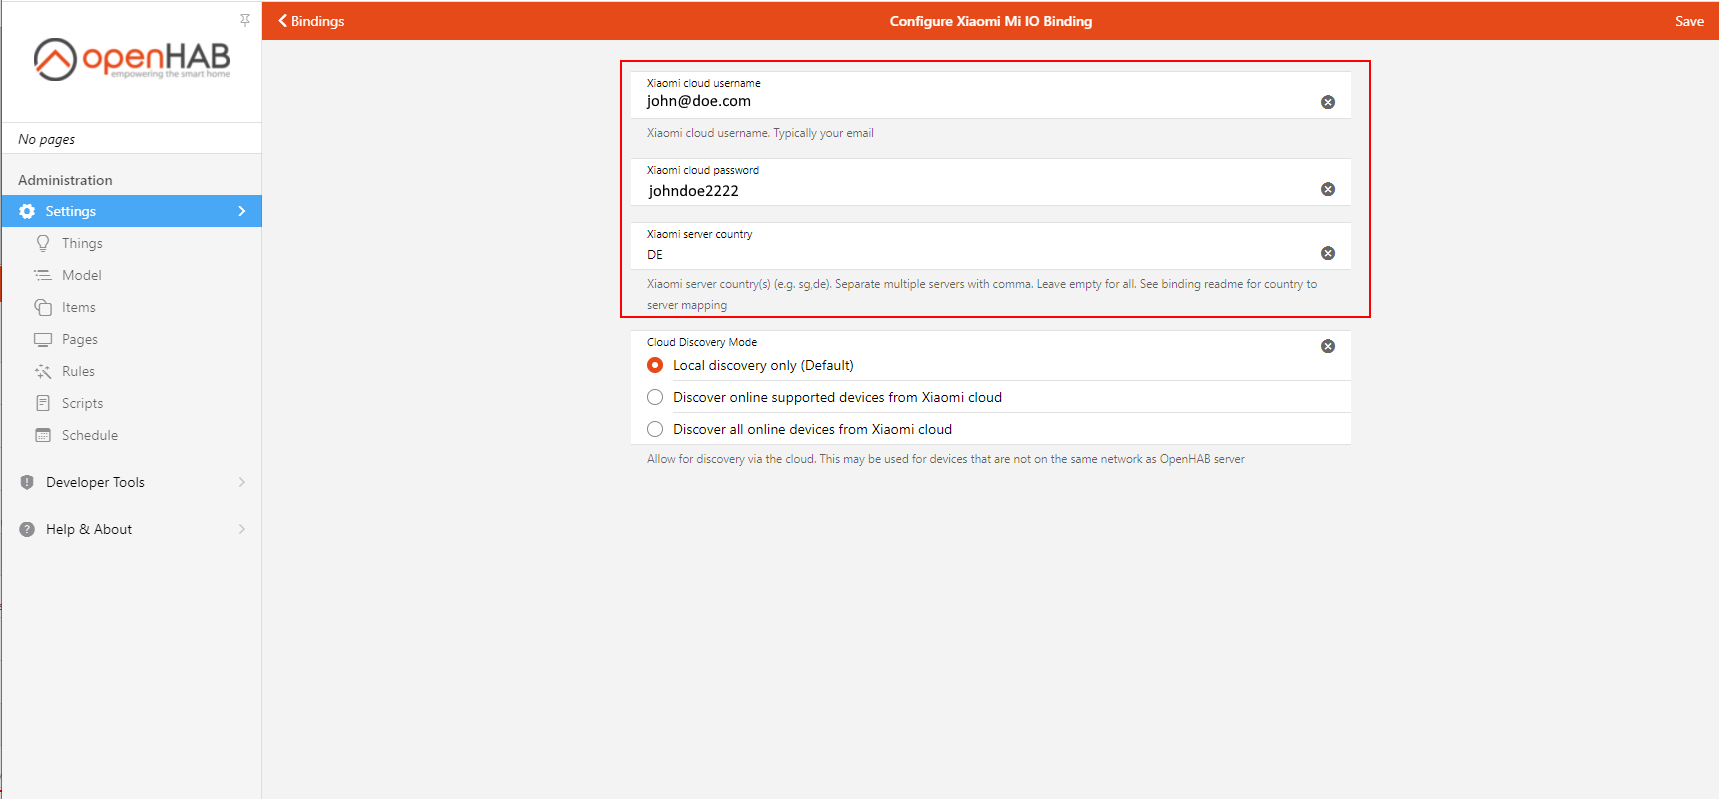
- Install XIAMI MI IO Binding
- Create thing “Robot Vacuum”
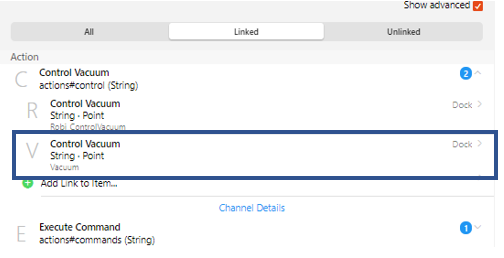
Create all channels required
For “Dock” and “Pauze” and “Start Plan” you have the create 1 channel as can be seen in the following image:
To be done in Nodered
In Nodered we will connect the information coming from free@home to OpenHab. Since both systems don’t speak the same language we will have to create some functions. This will create the correct action in Robi when initiated from free@home, but also will provide the correct info coming from Robi. For example on the panel you would like to see whether Robi is Paused or in the Dock, this will be visible through a 0 or a 1 on the corresponding button in the panel.
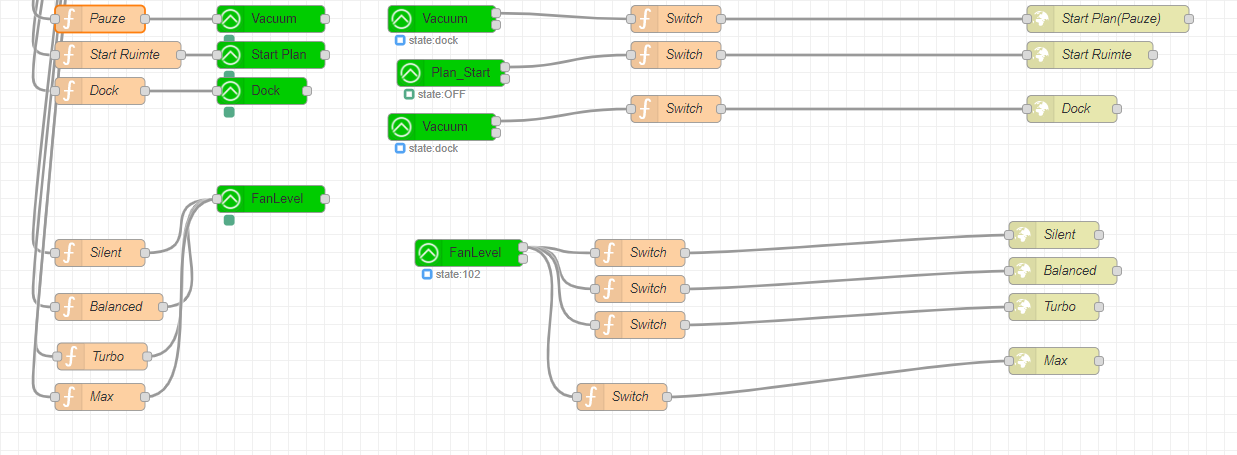
The screenshot below is an overview of the creations in NodeRed. On the left handside you find the info coming from free@home through the API, going through the functions into the green blocks. The green blocks are the channels made in Openhab.
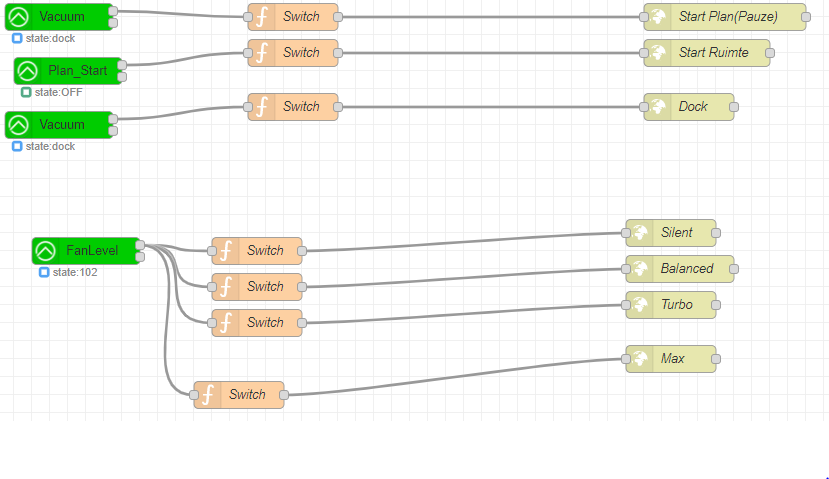
On the right handside you can see the info coming from openhab going through a function to show feedback in free@home, or perhaps on the panel.
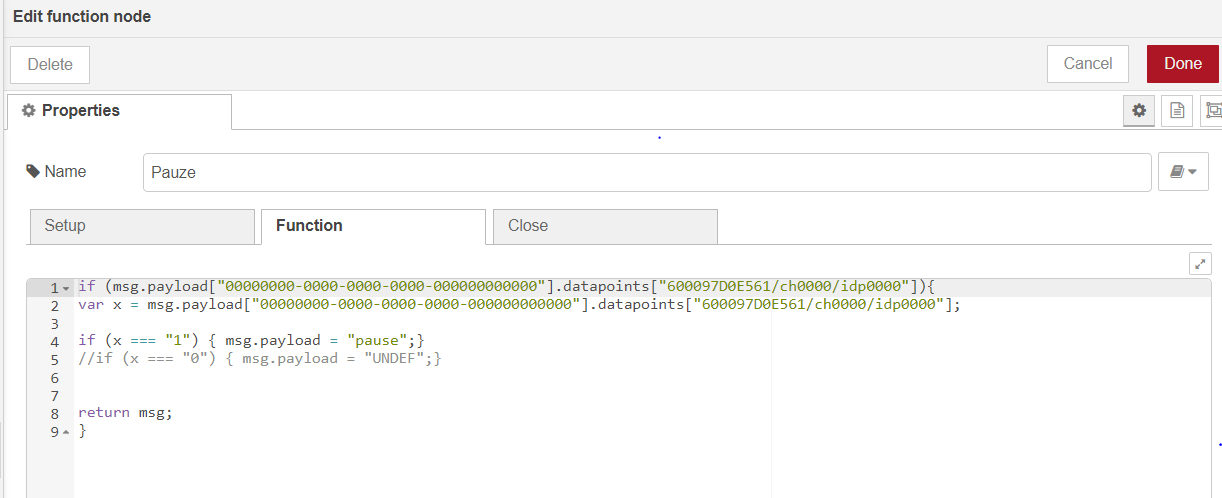
To activate Robi in whatever function we look at the lefthand side. Here we see the functions to Pauze, Start Plan and (return to) Dock as well as Fanlevel . As an example let’s have a look at the function for the actions “ PAUZE”
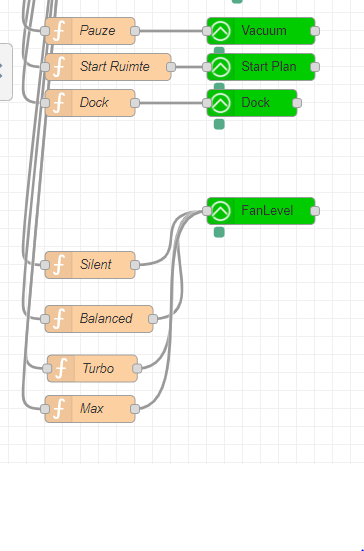
So we read the data from the Virtual device through its serialnumber and the connected channel. Once the data is checked it creates an Output with either “pause” or “UNDEF”. With action PAUZE, Robi will Pauze the vacuming and remain in place. If the button Pauze is not pushed it sends the command UNDEF, Robi will continue what it is doing. To Start Robi you have to replace “ pause” for “Vacuum” in the designated function, for “Dock” replace “pause” for “dock”.
To select the fan level, the code is written slightly different since these features are not activated by words but by numbers. Make sure you connect the correct Button to the correct number. F.e. Balanced = 102.
Once we are able to activate Robi, the next step is to show Robi’s status on the panel:
Here it works vice versa. We receive info from Openhab that needs to be translated into a coding understood by free@home. Besides that, free@home won’t let you write without providing the login credential. These credentials are identical to the ones you used in “ Swagger”. Below an example of the function for “ Dock”
If we receive the status “Dock” from Openhab we change the payload to 1. If “dock” is not received, we send a 0.
This payload is send to the Put boxes as you can see on the far right.
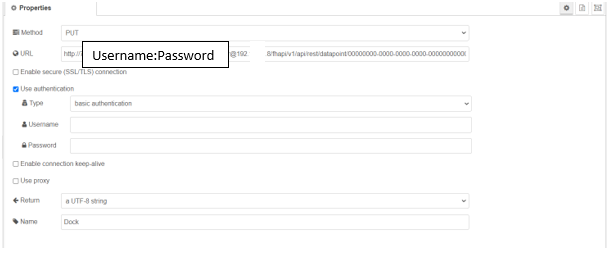
An example of the setup of this is shown below. Make sure you provide the Username:Password@Ipaddress. Without this additional info your feedback will bounce and not show in the free@home environment.
To make it easy for you I have copied the link.
http://username:pasword@IP address/fhapi/v1/api/rest/datapoint/00000000-0000-0000-0000-000000000000/serialno virtual device named “Dock”.ch0000.odp0000
Once you have connected all the datapoints you should be able to control Robi through free@home.
Wishing you loads of fun and a even more comfortable home







Wähle ein Bild
Bildformate: image/gif, image/jpeg, image/jpg, image/png
Max. Dateigröße: 10 MB
URL Informationen hinzufügen
Hier kannst du URL Informationen hinzufügen
So wird es aussehen